借助Cloudflare Worker获取公网IP
创建Worker
-
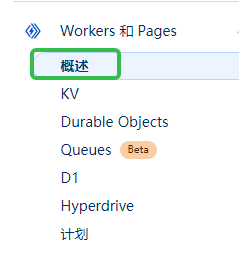
登录 cloudflare 后,选择 [Workers 和 Pages] –> [概述]
-
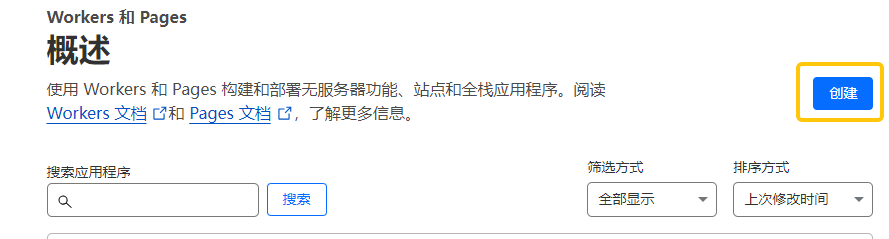
创建
创建worker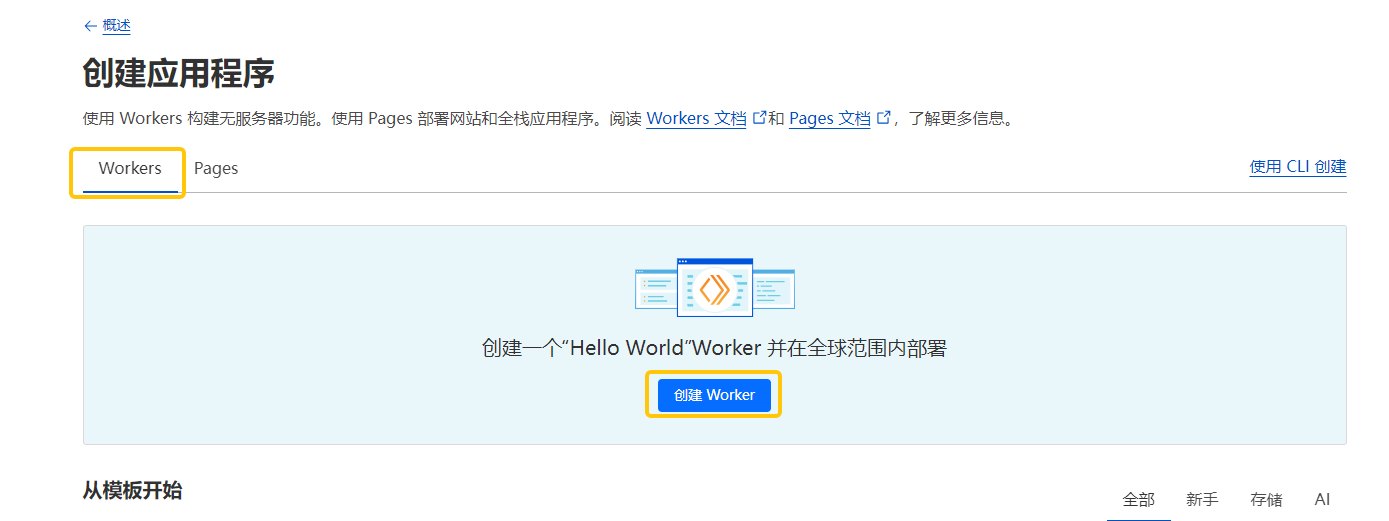
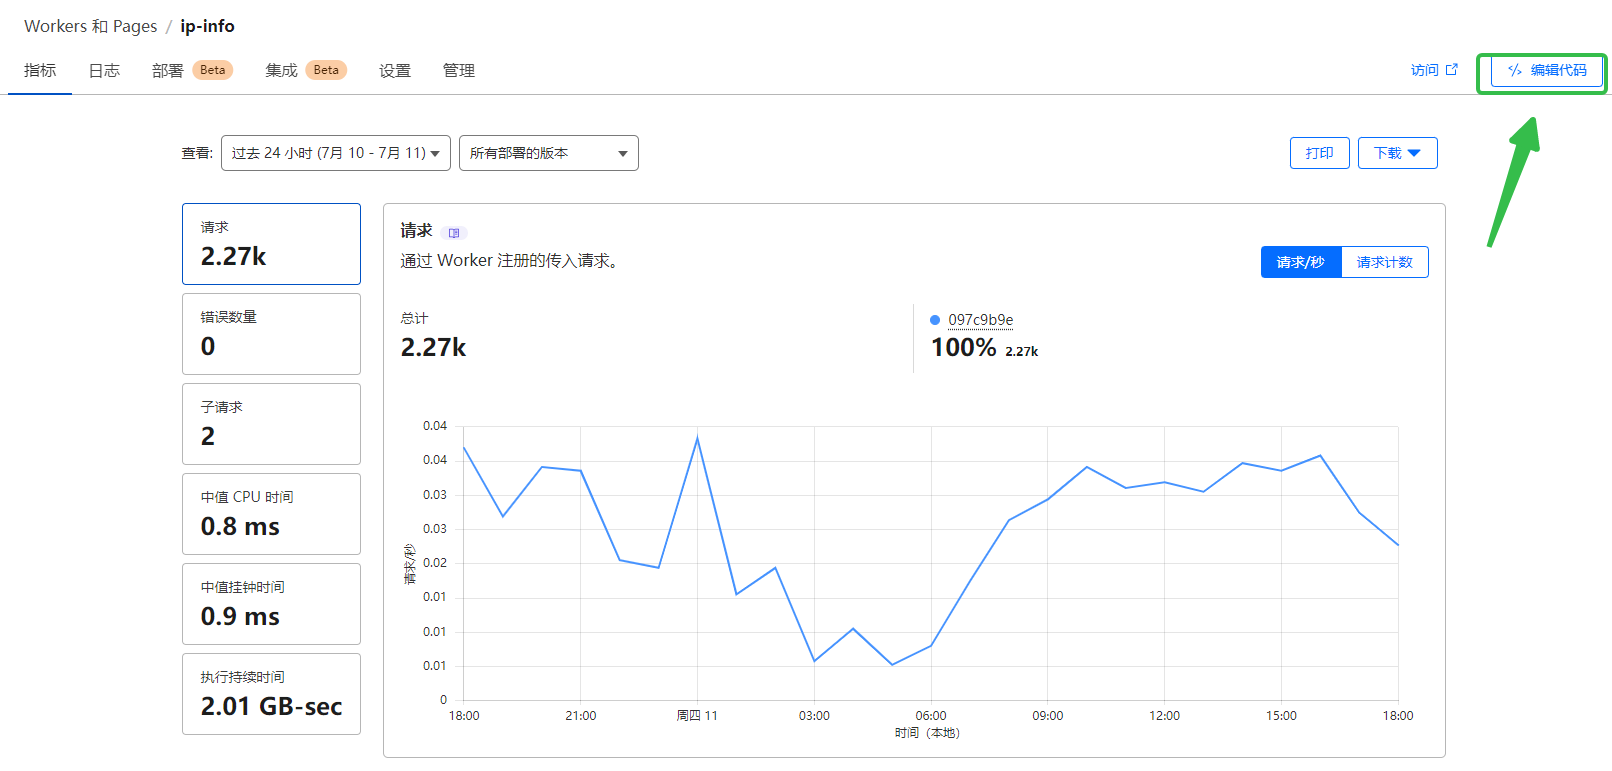
自定义名字后,点击部署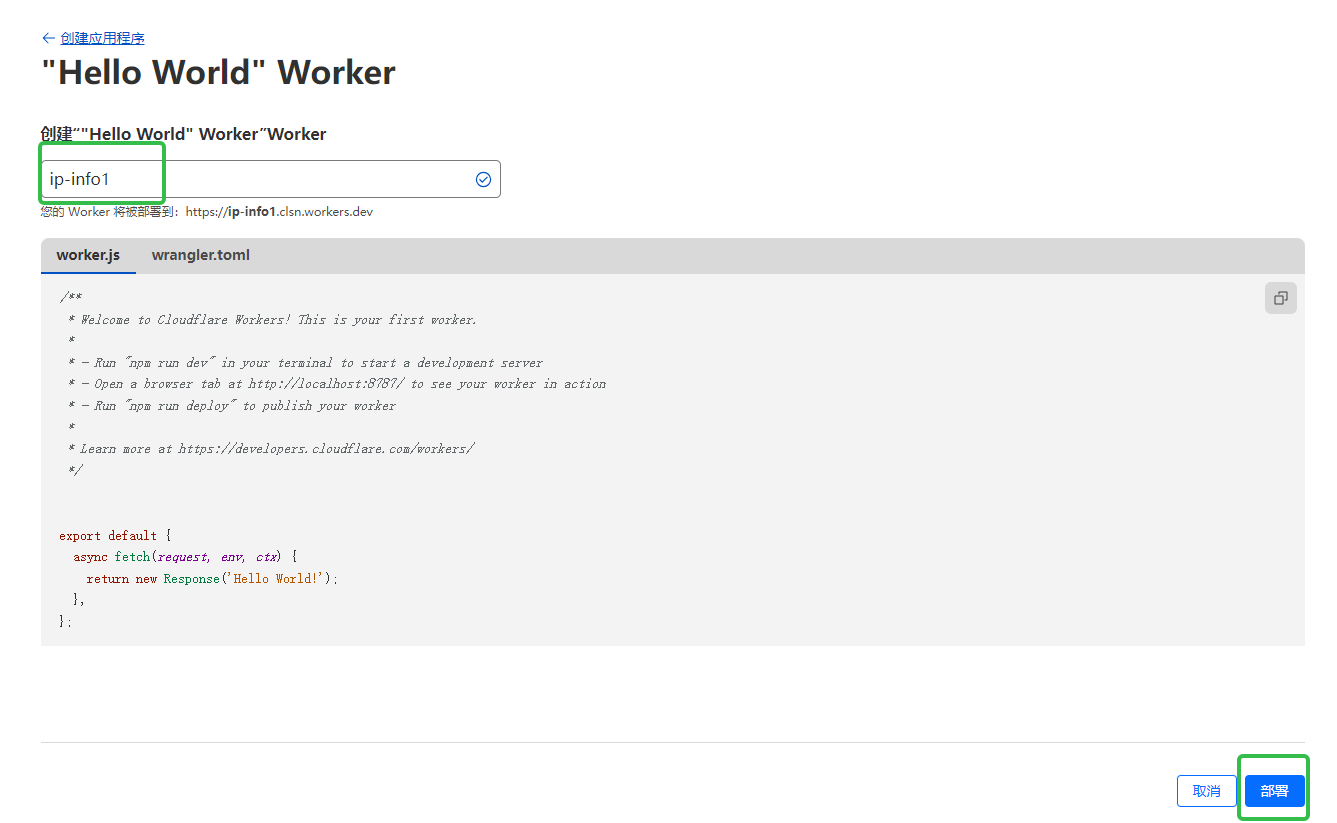
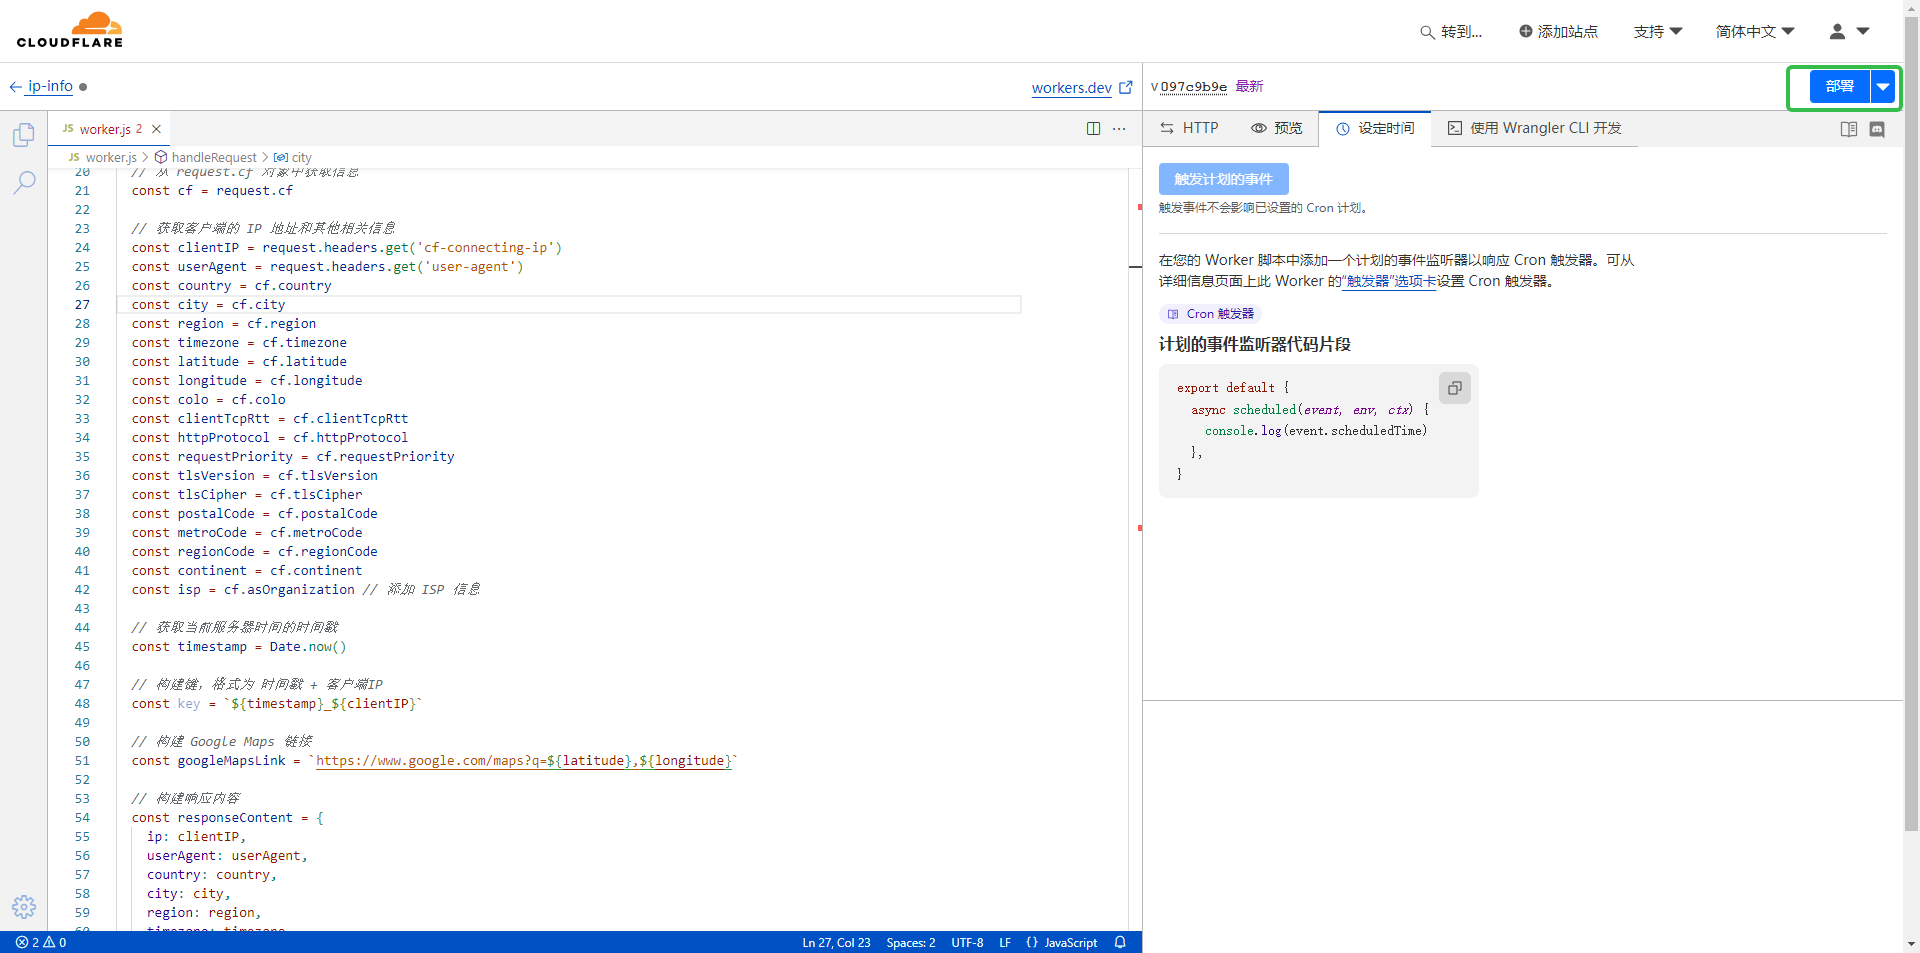
编辑代码
创建完成后通过编辑代码
输入以下代码
addEventListener('fetch', event => {
  event.respondWith(handleRequest(event.request))
})

async function handleRequest(request) {
  const url = new URL(request.url)
  const pathname = url.pathname.split('/')

  // 如果请求的是 /list 路径,则列出 Cloudflare Workers KV 中的全部数据
  if (url.pathname === '/list') {
    return listAllData(IP_KV_NS, url);
  }

  // 如果请求的是 /ip/{specific_ip} 路径,则查询指定 IP 的信息
  if (pathname.length === 3 && pathname[1] === 'ip') {
    const specificIP = pathname[2]
    return getSpecificIPData(specificIP)
  }

  // 从 request.cf 对象中获取信息
  const cf = request.cf

  // 获取客户端的 IP 地址和其他相关信息
  const clientIP = request.headers.get('cf-connecting-ip')
  const userAgent = request.headers.get('user-agent')
  const country = cf.country
  const city = cf.city
  const region = cf.region
  const timezone = cf.timezone
  const latitude = cf.latitude
  const longitude = cf.longitude
  const colo = cf.colo
  const clientTcpRtt = cf.clientTcpRtt
  const httpProtocol = cf.httpProtocol
  const requestPriority = cf.requestPriority
  const tlsVersion = cf.tlsVersion
  const tlsCipher = cf.tlsCipher
  const postalCode = cf.postalCode
  const metroCode = cf.metroCode
  const regionCode = cf.regionCode
  const continent = cf.continent
  const isp = cf.asOrganization // 添加 ISP 信息

  // 获取当前服务器时间的时间戳
  const timestamp = Date.now()

  // 构建键,格式为 时间戳 + 客户端IP
  const key = `${timestamp}_${clientIP}`

  // 构建 Google Maps 链接
  const googleMapsLink = `https://www.google.com/maps?q=${latitude},${longitude}`

  // 构建响应内容
  const responseContent = {
    ip: clientIP,
    userAgent: userAgent,
    country: country,
    city: city,
    region: region,
    timezone: timezone,
    latitude: latitude,
    longitude: longitude,
    colo: colo,
    clientTcpRtt: clientTcpRtt,
    httpProtocol: httpProtocol,
    requestPriority: requestPriority,
    tlsVersion: tlsVersion,
    tlsCipher: tlsCipher,
    postalCode: postalCode,
    metroCode: metroCode,
    regionCode: regionCode,
    continent: continent,
    isp: isp, // 添加 ISP 信息
    googleMapsLink: googleMapsLink,
    Information: cf,
    currentTime: timestamp,
  }

  // 设置过期时间为当前时间 + 24 小时
  const expirationTime = new Date(Date.now() + 24 * 60 * 60 * 1000).toISOString()

  // 将数据保存到 Cloudflare Workers KV 中,并设置过期时间
  // await saveToKV(key, JSON.stringify(responseContent), expirationTime)

  // 返回响应给客户端
  return new Response(JSON.stringify(responseContent, null, 2), {
    headers: { 'content-type': 'application/json', 'Access-Control-Allow-Origin': '*' },
  })
}

// 将数据保存到 Cloudflare Workers KV 中,并设置过期时间
async function saveToKV(key, value, expirationTime) {
  try {
    const metadata = { expiration: expirationTime }
    await IP_KV_NS.put(key, value, { metadata: metadata })
    console.log(`Saved to KV with expiration: ${key}`)
  } catch (error) {
    console.error('Error saving to KV:', error)
  }
}

// 列出 Cloudflare Workers KV 中的全部数据,并按时间倒序排列
async function listAllData(IP_KV_NS, url) {
  const pageSize = parseInt(url.searchParams.get('pageSize')) || 10
  const pageToken = url.searchParams.get('pageToken') || undefined

  try {
    // 获取全部数据
    const { keys, list_complete, cursor } = await IP_KV_NS.list({ limit: pageSize, cursor: pageToken })

    // 读取每个键的值和元数据
    const keyPromises = keys.map(async key => {
      const { value, metadata } = await IP_KV_NS.getWithMetadata(key.name)
      const parsedValue = JSON.parse(value)
      return { key: key.name, value: parsedValue, metadata }
    })

    const keyValues = await Promise.all(keyPromises)

    // 将 keyValues 倒序排列
    keyValues.reverse();

    // 构建响应数据
    const responseData = {
      keyValues: keyValues,
      nextPageToken: list_complete ? null : cursor,
    }

    // 返回响应
    return new Response(JSON.stringify(responseData, null, 2), {
      headers: { 'content-type': 'application/json', 'Access-Control-Allow-Origin': '*' },
    })
  } catch (error) {
    console.error('Error listing data from KV:', error)
    return new Response(JSON.stringify({ error: 'Internal Server Error', message: error.message }), { status: 500 })
  }
}

// 获取指定 IP 的信息
async function getSpecificIPData(ip) {
  const response = await fetch(`https://ipinfo.io/${ip}/json`)
  const data = await response.json()

  const responseContent = {
    ip: data.ip,
    country: data.country,
    region: data.region,
    city: data.city,
    timezone: data.timezone,
    latitude: data.loc.split(',')[0],
    longitude: data.loc.split(',')[1],
    isp: data.org,
    googleMapsLink: `https://www.google.com/maps?q=${data.loc}`,
    currentTime: Date.now(),
  }

  return new Response(JSON.stringify(responseContent, null, 2), {
    headers: { 'content-type': 'application/json', 'Access-Control-Allow-Origin': '*' },
  })
}
代码贴好后选择部署
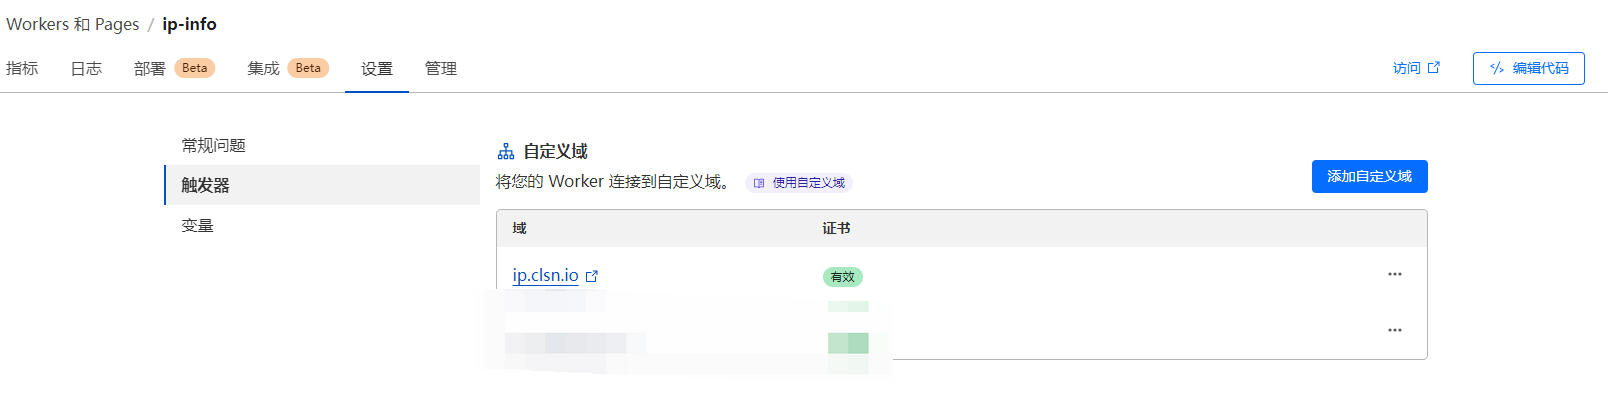
配置自定义域名
部署完成后,进入自定义域名配置,添加自己的专属域名。
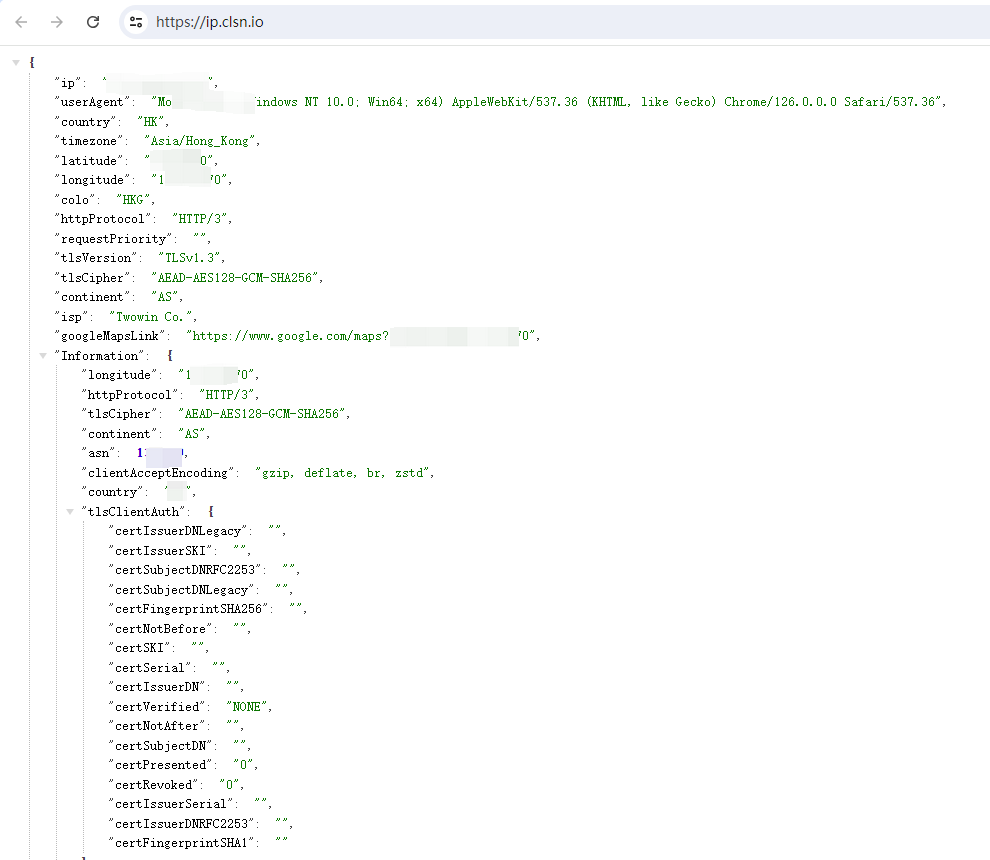
访问测试
配置浩自定义域名后即可访问呢
- 原文作者:惨绿少年
- 原文链接:https://clsn.io/post/2024-07-11-%E5%80%9F%E5%8A%A9cloudflare%E8%8E%B7%E5%8F%96%E5%85%AC%E7%BD%91ip.html
- 版权声明:本作品采用知识共享署名-非商业性使用-禁止演绎 4.0 国际许可协议进行许可,非商业转载请注明出处(作者,原文链接),商业转载请联系作者获得授权。